How to Upscale Old Photos for Printing (Without Them Looking Terrible)
I spent weeks figuring out how to upscale old family photos for prints. Here's what actually worked, from 2x to 16x, without the fake AI look.
My mom handed me a shoebox last year. Inside: about 200 family photos from the 70s and 80s, most of them 3×5 prints she wanted blown up for a photo wall. I thought, “No problem, I'll just scan and print them.”
Yeah, that didn't work. A 300 DPI scan of a 3×5 print gives you maybe 900×1350 pixels. Try stretching that to an 8×10 and it looks like a pixelated mess. That's when I fell down the AI upscaling rabbit hole.
After testing way too many tools and wasting a lot of photo paper, here is what I learned about getting genuinely good prints from old scans.
Scan at the highest DPI you can
This seems obvious but it's worth saying: you can't fix what isn't there. I scan everything at 600 DPI minimum now, and 1200 DPI for really small photos. The AI needs actual pixel data to work with. A blurry 200 DPI scan will still look bad no matter how much AI magic you throw at it.
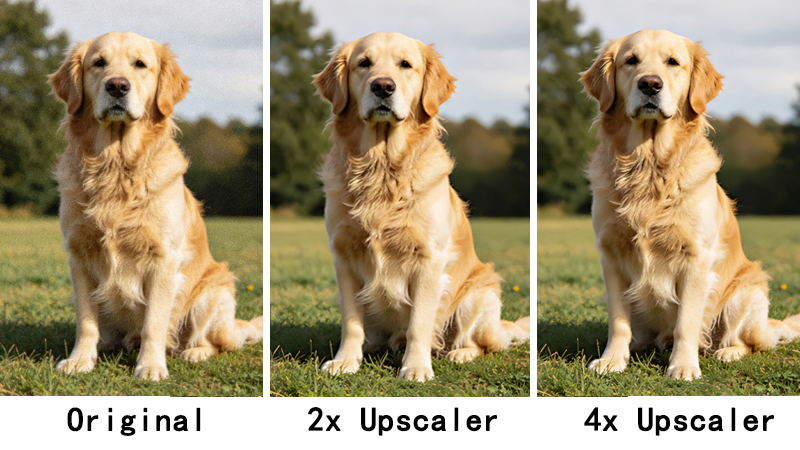
Pick the right upscale factor for your print size
Not every photo needs maximum upscaling. The scale factor you choose depends on the original photo size and what you want to print. Here is what works for each scenario:
| Upscale | Best For | Example | Credits |
|---|---|---|---|
| 2x | Digital sharing, social media, high-DPI screens | 3×5 scan (900px) → sharp on any screen | 2 |
| 4x | Standard prints up to 8×10 or 11×14 | 3×5 scan → clean 8×10 print at 300 DPI | 4 |
| 8x / 16x | Large format prints, canvas, posters | Small wallet photo → poster-size print | 8 / 16 |
Face enhancement: use it, but don't abuse it
Most upscalers have a face enhancement option. For portraits and group shots, turn it on — it makes a real difference. But I keep it off for landscapes and shots where people are tiny in the frame. Over-enhancing faces in wide shots makes people look like they were photoshopped in from a different photo.
Do a test print first
Before you commit to printing 50 photos, do one test. I wasted $30 at the print shop before I figured out that my monitor brightness was way higher than what the printer produced. Now I print one 4×6 test for every batch and adjust from there. Saves paper, saves money, saves frustration.
Common mistakes I made so you don't have to
- Upscaling a photo that was already decent and ending up with something that looked over-sharpened. If the original is already 2000+ pixels wide, you probably don't need to upscale it.
- Forgetting to clean dust off the scanner bed. AI upscaling will happily enhance those dust spots into very sharp, very visible artifacts.
- Going straight from scan to 16x without checking the intermediate result. I now do 2x first, check it, then go higher if needed.
The bottom line: AI upscaling works great, but it's a tool, not magic. Feed it good scans, use reasonable settings, and test your results before committing to expensive prints. My mom's photo wall turned out great in the end — took me about three weekends of scanning and processing, but totally worth it.
Want to try it yourself? ClarifyPix's upscaler handles 2x through 16x with a $1.99 7-day trial so you can test before committing.