Processing 500+ Family Photos with AI: A Realistic Guide
I inherited 600+ family photos and tried to batch process them with AI. Here is what I learned about organization, speed vs quality trade-offs, and not losing your mind.
When my parents downsized their house, they handed me three plastic bins of photo albums. “Here, you're the tech one.” I counted. Over 600 photos, spanning from the 1950s to the early 2000s. Some were fine. Many were not. And I had no idea where to start.
If you've got a similar mountain of family photos staring at you, here is the realistic, not-theoretical, this-is-what-actually-worked guide to batch processing them.
Step 1: Sort. I know, it's boring. Do it anyway.
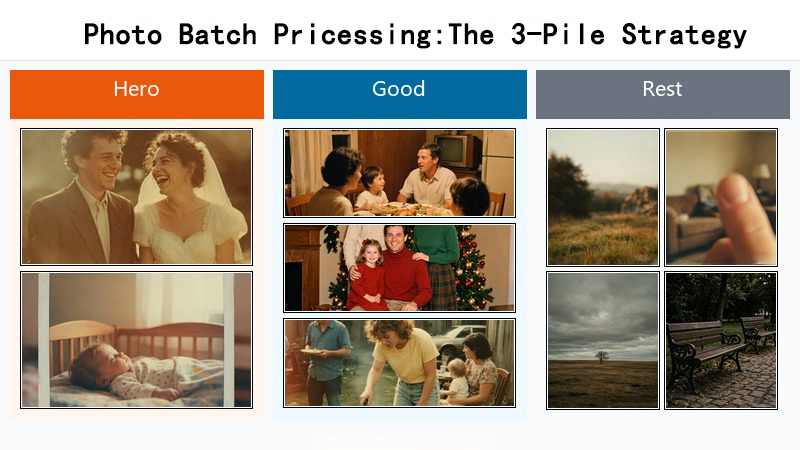
I skipped this step the first time and immediately regretted it. After randomly processing 50 photos, I had no idea which ones I had done, which settings I had used, or whether the results were any good. Now I sort everything into three piles:
- Hero photos: the wedding pictures, the baby photos, the one portrait of great-grandma. Maybe 5-10% of the collection. These get individual attention with the best settings.
- Good photos: nice family moments, holiday shots, school pictures. Worth doing properly but don't need obsessive attention. Maybe 30-40% of the pile.
- The rest: blurry duplicates, photos of scenery nobody remembers, that one picture of a thumb covering half the frame. Quick pass or skip entirely.
Step 2: Use batch uploads, not one-at-a-time
Most tools let you upload multiple photos at once. Use this. I do batches of 20 — that is small enough to review results between batches but large enough to actually make progress. The tool processes them one after another automatically. I check my email or do the dishes while it runs, then come back to review.
One thing I learned: don't set up all 20 and walk away for the day. If photo #3 fails because of some weird file format issue, you want to catch it quickly rather than discovering it three hours later.
Step 3: Match the settings to the photo quality
You don't need 4x upscaling and face restoration on every single photo. I use a simple rule:
- 2x upscale, no extras: for the “rest” pile — quick pass, decent results, uses minimal credits
- 2x upscale + restoration: for “good” photos with visible damage
- Full treatment: restoration + face restore + 4x upscale — for hero photos only
Spreading your credits across 600 photos means being strategic about where you spend them. A 500-credit monthly plan covers about 250 basic restorations — so for a 600-photo collection, you are looking at roughly three months of on-and-off work if you stay in plan. Or you can speed things up with credit packs.
Step 4: Review between batches. Actually review.
The biggest mistake is hitting process and trusting that everything came out fine. I spot-check at least 3 photos from every batch of 20. Specifically, I look at faces — if the AI over-processed someone's face, it is usually obvious and I want to redo that photo with different settings before moving on.
Is this actually worth the time?
For the hero photos, absolutely. The wedding photos I restored and printed as a gift for my parents got the kind of reaction that makes this whole project worthwhile. For the blurry photos of random scenery, honestly, no — those are fine staying in the bin.
I also discovered that after the first 100 photos or so, you get a lot faster. You develop a rhythm, you know which settings work for your family's specific photo collection, and you stop agonizing over every single decision. The key is just starting.
Process your family photo collection. ClarifyPix batch processing handles up to 20 photos at a time, and the Pro plan (500 credits/month) covers about 25 fully restored photos per month.